http://www.richgentlemenhide.com/articles/photoshop-tutorial-fountain-of-youth/
The Fountain of Youth - that elusive magical location where the old turn young, the young turn younger!
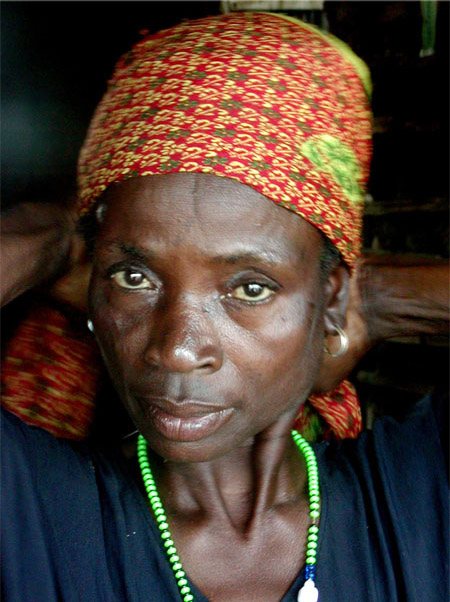
Our aim here is to return an old, though by no means
unattractive, woman to her former glory. She may not have walked the catwalks
in her youth, but by the end of this tutorial she just might.
Start with a decent, Hi Resolution photograph of an older woman.
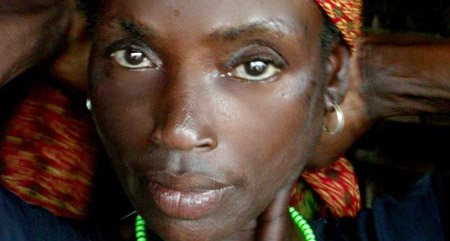
Facial Reconstruction
For the first step, you’ll want to open the liquify tool.
Duplicate the layer and then select Filter > Liquify
Begin by lifting areas that have sagged with age - The cheeks, lips, brow &
ears. The nose and ears keep growing throughout life, so you’ll want to neaten
these up a little.

The Skin-Job
The next step we are going to begin replacing the skin.
Though I’ve used a slightly different technique here, I’ll generally start by
duplicating the layer, running a strong dust and scratches or blur filter over
the image, and then selectively erasing ![]() the
details. You’ll only want the dust and scratches layer to be about 30% opacity
to soften the skin tone.
the
details. You’ll only want the dust and scratches layer to be about 30% opacity
to soften the skin tone.
In this instance I’ve found several skin samples and brush ![]() colourised
them to match the skin, replacing areas panel by panel. I’ve tried not to lose
too much of the original skin texture, so while the pores and wrinkles are
minimised & softened, the character of the face remains.
colourised
them to match the skin, replacing areas panel by panel. I’ve tried not to lose
too much of the original skin texture, so while the pores and wrinkles are
minimised & softened, the character of the face remains.
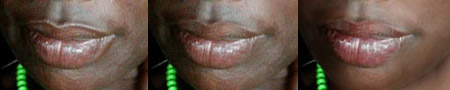
Say “Kiss me”
I’ve done a heap of painting around the lips to plump them up, and allow them to catch the light. I’ve also selected the existing hightlights and enhanced them with Image > Adjust > Brightness/Contrast. I’ve then colourised them a little to give a slight gloss lipstick appearance.
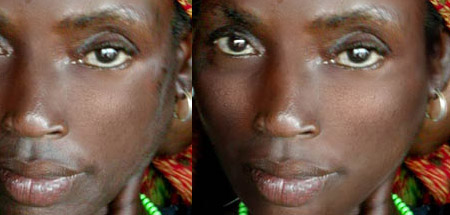
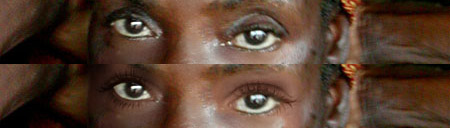
You Nexus, huh? I design your eyes!
"If only you could see what I’ve seen with your
eyes."
The first step I always take with eyes and teeth, is to desaturate them with
the Sponge Tool ![]() They’re
never white, so careful not to overdo it, but removing yellowed or red eyes is
vital. You might also choose to soften or smudge parts of the white to give it
a healther look.
They’re
never white, so careful not to overdo it, but removing yellowed or red eyes is
vital. You might also choose to soften or smudge parts of the white to give it
a healther look.
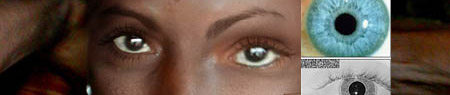
With skin grafts & extensive painting, piece by piece I’ve replaced the
skin around the eyes to get rid of the “hollowed” look that comes with age.
You’ll need to burn ![]() or
dodge
or
dodge ![]() areas
to get them just right, but with a bit of persistence, you should be able to
get something halfway decent.
areas
to get them just right, but with a bit of persistence, you should be able to
get something halfway decent.
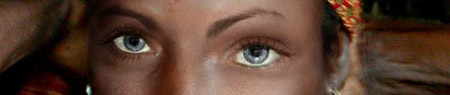
Having done that you’ll want to paint ![]() some
eyelashes in one by one, and rework any age damage done to the eyebrows.
some
eyelashes in one by one, and rework any age damage done to the eyebrows.
You might choose to enhance this beyond strict realism by making the eyes themselves a little more engaging. I’ve chosen to do this by adding a slight blue hue to the eyes. This is a subtle effect, and shouldn’t be overdone.
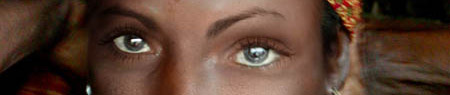
The Prodigal Daughter Returns!
And voila. The finished result, ready to strut her stuff
down the catwalks of Uganda & snort cocaine with Pete Doherty.
Roll over the image to see the original

I hope you’ve enjoyed this Pro Photoshop Tutorial Leave us a comment or
two if you are unsure about any part of the process. I’d love to see your
results! Update: So now you’ve made your grandmother into a young woman, see
what your girlfriend will look like when she’s an old lady with this tutorial
on aging people from the Photoshop
Lab!