1) Selecting your Brush.
Adobe Photoshop is a wonderful program with great advances in its brush engine.
Creating brushes is easy and intuitive. For this tutorial I use primarily one
brush and below are the steps used to create it.
Open the Brushes Palette:
-Opacity jitter should be set to pressure.
-Brush Tip Shape - Set your spacing low, I use 7% here.
-Flow - On the brush tool bar set your flow to a low setting, I have chosen 10%
Keep in mind that on larger canvases settings like these can degrade
performance but for this example it shouldnt be a problem.
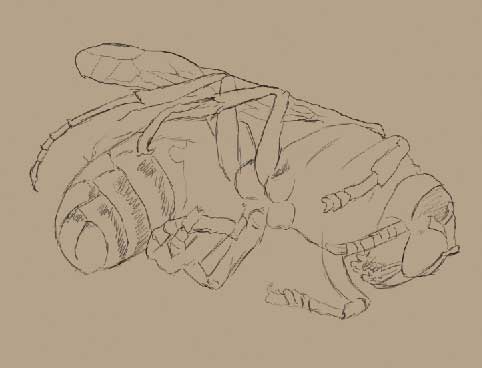
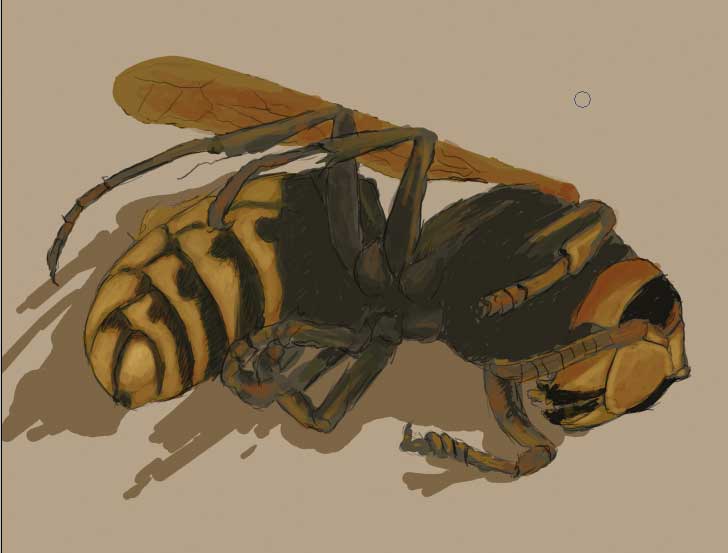
1. Sketch the outline and important areas of your image. I am
concerned only with placement and rough proportions, the drawing doesn't have
to look finished. I usually have a 'sketch layer' on top then a render layer
beneath, and then the background layer below that, so three layers in total. In
this painting I add one more layer - a drop shadow layer.
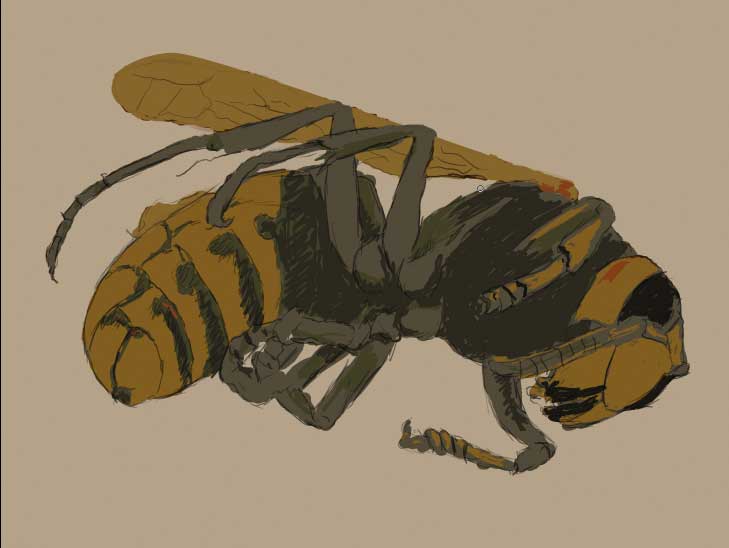
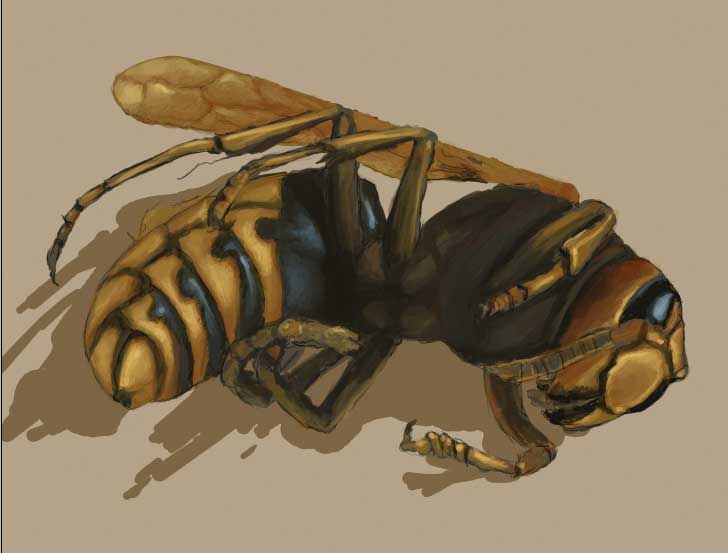
2. Block in color areas, getting a rough idea of the hues I
want to use. I usually start off a bit darker and build up to the highlights.
This is taking place on my render layer (render all on one layer primarily
except for backgrounds occasionally) . This can go a bit faster if you turn the
brush's opacity jitter 'off' for this step.
3. Block in a quick shadow - you can use a separate layer for
this if you want - place it beneath the render layer and above the background
layer.
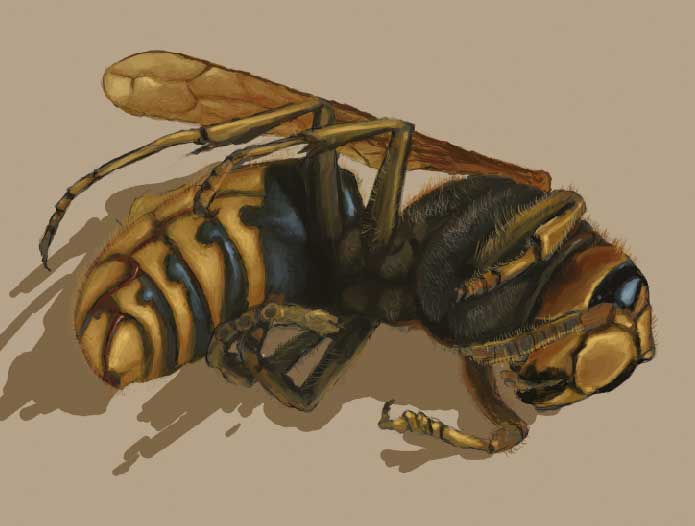
4. Adding in some tones of red and blue - beginning to flesh
things out a tad.
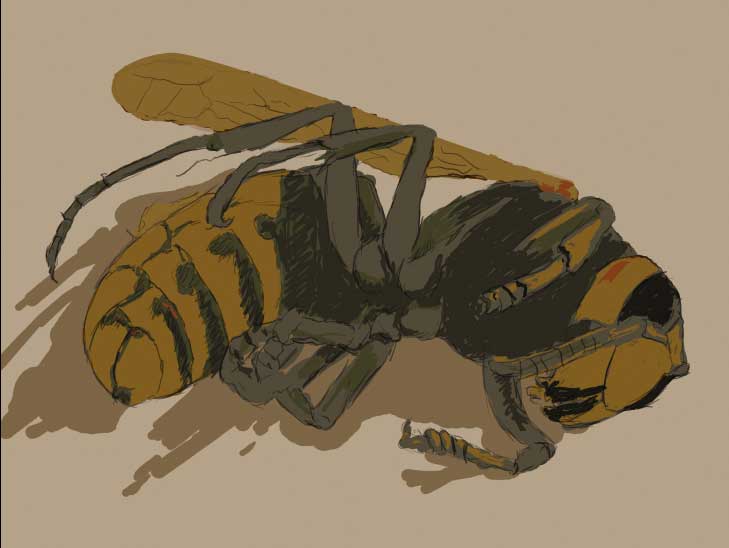
5. Starting to build the highlights. I
have chosen a more saturated yellow orange than the base I had layed down.
Avoid using dodge or burn settings, its often a poor substitute for proper
values and color.
6. More of step 5, but this time adding in some blue
highlights and blending in the colors. This is done by using the brush's
opacity and continous sampling of sorunding colors with the eyedropper tool
"i" (for quicker access to the eyedropper use the 'alt' tab while you
are in brush mode). I didn't want to go for exact realism in color in this
painting, I wanted to really bump up the vibrancy of the image so I am playing
with more saturated colors.
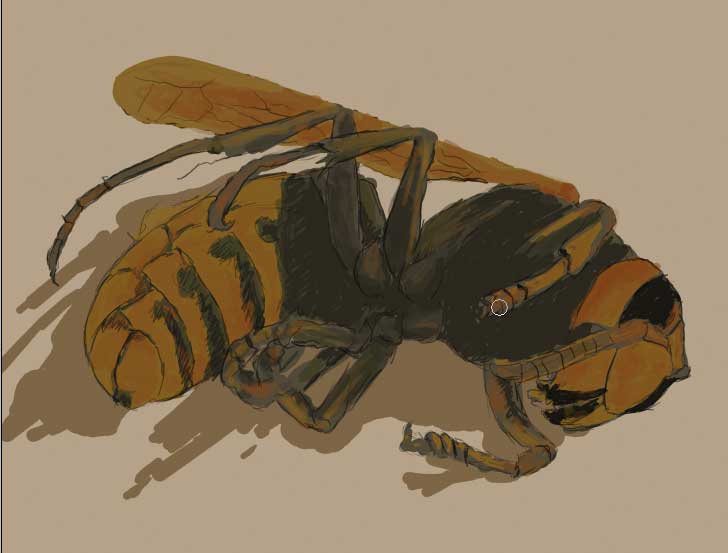
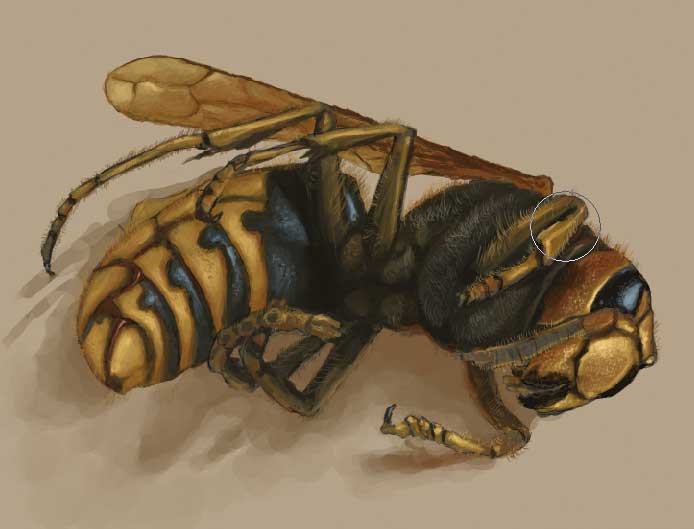
7. With a small brush I add some hairs about the body, and
continue to render the wasp, giving the subject more depth.
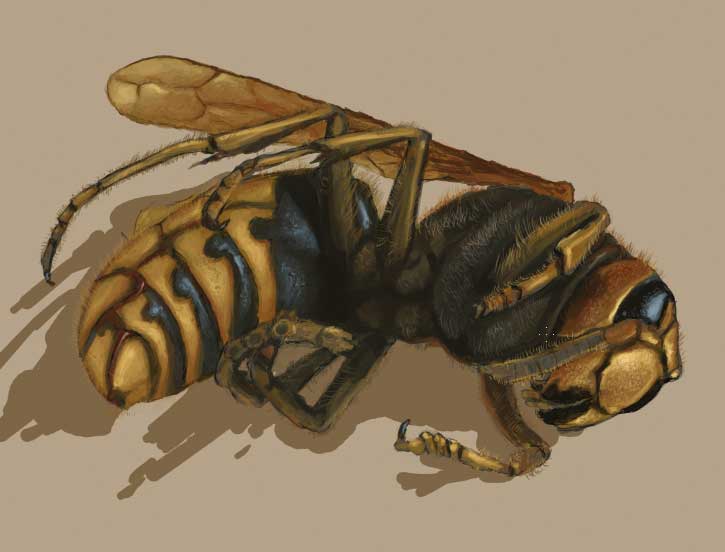
8. More highlights and some texture to the hard 'skin' of the
wasp. Again using a small round brush.
9. I switched to the shadow layer and begin blending it out.
Continue blending until happy.
The Final
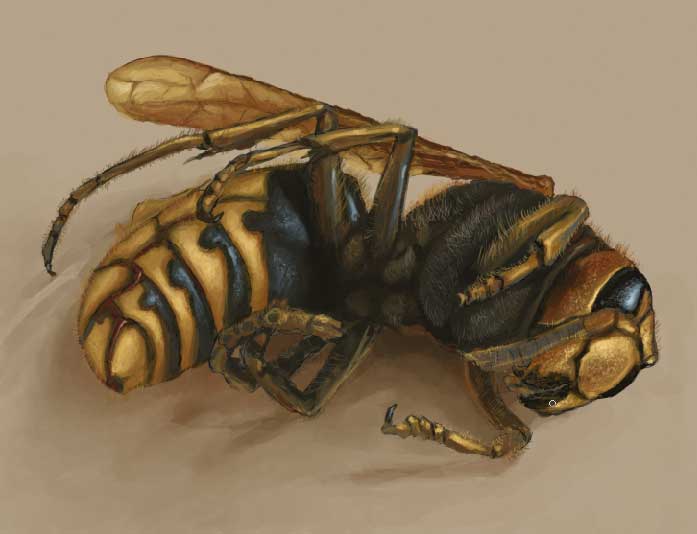
There you have it, a finished Digital
painting. I hope you enjoyed it. :)
This tutorial was created by Chris
Arlidge of www.steeldolphin.com,
if you have questions about this tutorial or would just like to share your own
attempts with other artists visit the Steel Dolphin Creative - Art and Design
Forums: www.steeldolphin-forums.com.
http://www.steeldolphin-forums.com/htmltuts/painting_steps.html