Artist statement
Since I was young, I was fascinated with working on computer graphic. I have tried many fields in computer graphic like 3D graphic, animation, and web design. But in these recent years, I have worked more on photography. Still, there are a lot of overlap between nowadays photography and computer graphic, such as photo retouching. I heard and saw a technique called HDR photography which is another way to integrate photography with computer graphic. Therefore, working on HDR photography will be a great opportunity to increase my knowledge on the two that I enjoy.
At first, my purpose of the project was to create a beautiful collection of HDR images. However, I met many problems during the process. Therefore, I add a new goal to my project: not only I want to make HDR photo gallery but also to spread knowledge that I have learnt during the project to other people, so I decide to create a web tutorial and gallery of HDR photography.
A little bit about HDR
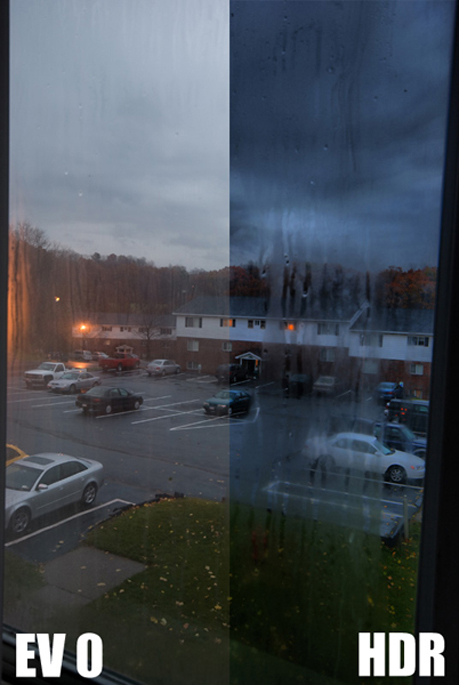
HDR stands for High Dynamic Range, which referred to a larger range of value between lightness and darkness. At first, HDR technique was developed for imitating real world light in computer generating images. Nevertheless, now this technique is being widely used for another purpose which is to create an exaggerated dynamic range image from combining different exposure of photos. Because HDR image has a higher dynamic of light, it contains a larger value of color; thus, it has to be saved in 32-bit color. However, normal computer screens and printers cannot show 32-bit color. To turn HDR image into image that is compatible with normal computer screens and printers, tone mapping, which is a technique that tries to map colors of HDR image to image that can be displayed in a normal screen, need to be used. This technique, nevertheless, usually causes color of produced image to be exaggerated. So people now use HDR techniques in a more artistic way rather than trying to imitate real scene.
There are much more detail about HDR image. But this webpage is a tutorial, not an encyclopedia. So I am not going to go on a further detail. If you want to know more about the HDR image, just simply search it on the Internet (or click here).
Getting ready
Like other types of art, creating HDR image need equipments. Although HDR photography can simply be done by one digital camera and computer that has Photoshop, good HDR photography needs more than that. Before going to equipments list, lets me talk about what you need to create HDR image. You need at least two photos of a same scene with different exposures (yet there is exception in some circumstances).
Digital camera (self-timer, auto bracket)
When you go to higher exposure, you need lower shutter speed. Anyhow, this means that you need a camera that can handle low shutter speed situation. Therefore, you need self-timer because it can reduce a camera shaking caused by pressure from when you click. This shaking can clearly be noticed if you do not use a good quality tripod. Auto bracket is needed because it can help reducing your time of calculating what shutter speed that you should use. This also helps you avoid moving your camera. DSLR (Digital Single Lens Reflex) camera is also really recommended because DSLR can give you a much better quality photo comparing to a point-and-shoot digital camera. Many DSLR also can handle RAW file which has a much better quality than a normal file and can allow you to create HDR image from one photo (more about this later).
TripodTripod is HDR photographys best friends. It does not only allow you to use as low shutter speed as you want, but it is also help you get a set of photos of a same scene. The size of tripod depends on each situation.
ComputerWell, what can you do without computer? I recommend a relatively high spec one. Imaging how hard your computer has to think when it has to work with three RAW files at the same time.
SoftwareYou need software that can combine your photo into HDR file and turn HDR file into 8-bit image by tone mapping. The program that are widely used is nothing else, but the famous Photoshop. However, in order to get a beautiful HDR image, I suggest you to use a program that is made just for HDR technique. I have tried three programs for doing this task: Photoshop, Photomatix, and Dynamic Photo-HDR. In my opinion, Photoshop give me the least control during the tone mapping, and the program cannot read NEF file which is RAW format for Nikon camera. On the other hand, Photomatix has too much function to choose, and it is much more expensive than Dynamic Photo-HDR, so I choose Dynamic Photo-HDR. Still, Photoshop is usually needed for final retouching. Additionally, HDR images tend to have more noise than their original images, so noise reduction plug-in like Neat Image may be needed to solve the issue.
Tutorial
|
Taking photos
Do not turn on your computer yet, because you need to get photos for making HDR image first. The first task which is the really essential task is to find a scene. A good scene for take photos for HDR images is one that has a wide range of lightness and darkness (A typical HDR scene would be a landscape with sky that has a lot of clouds). Nevertheless, the subject of the scene can be very mundane, for HDR technique will bring out its interestingness through exaggerate lighting. Moving object will cause ghost image in the final image. This sometimes can be a problem but can also be a charming of HDR image. One caution is that try to avoid a large area with completely white or black, such as a really bright sky without a single cloud. Even with different exposure, there will not be enough data to compare.
After you find a just right scene, now it is time to set up your camera. First, set your ISO to the lowest value possible, for HDR technique creates more noise; therefore, lower your ISO is the best way to solve this problem. Then set up correct your aperture and shutter speed (I recommend using manual mode). And correct your focus and lock by turning to manual focus. Turn on self timer. Set up auto bracket (I recommend 2 EV or Exposure Value). Set your image to RAW quality if possible. Then set up your camera on tripod. If you do not have one, find a place to put your camera onholding it with your hand is your last choice. Although the process takes time, it is worthwhile. And you will do it faster as you getting use to it.
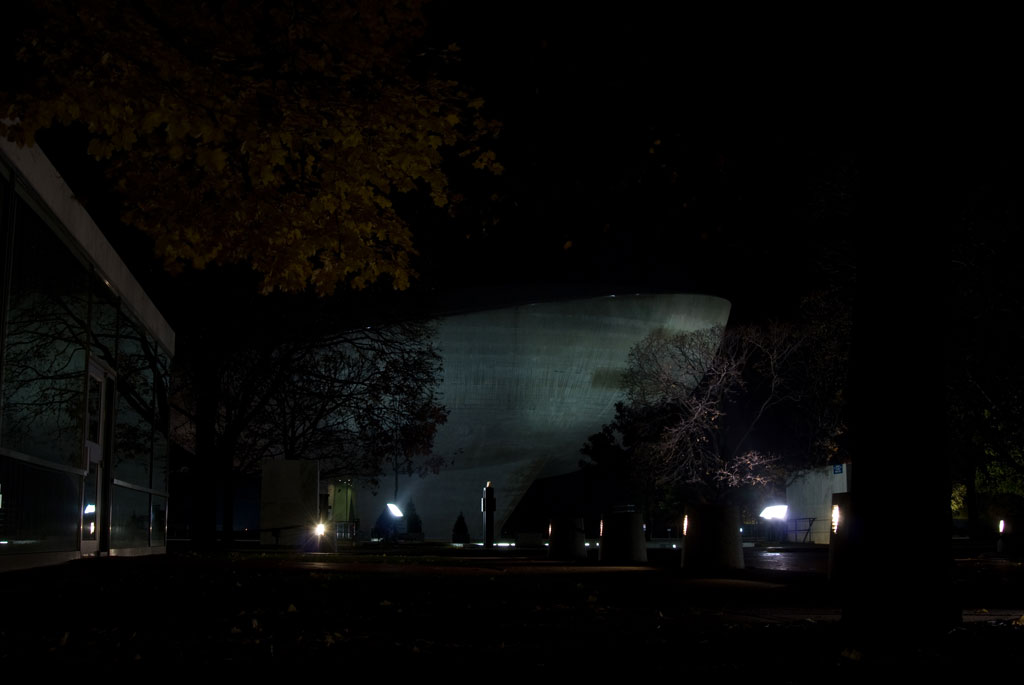
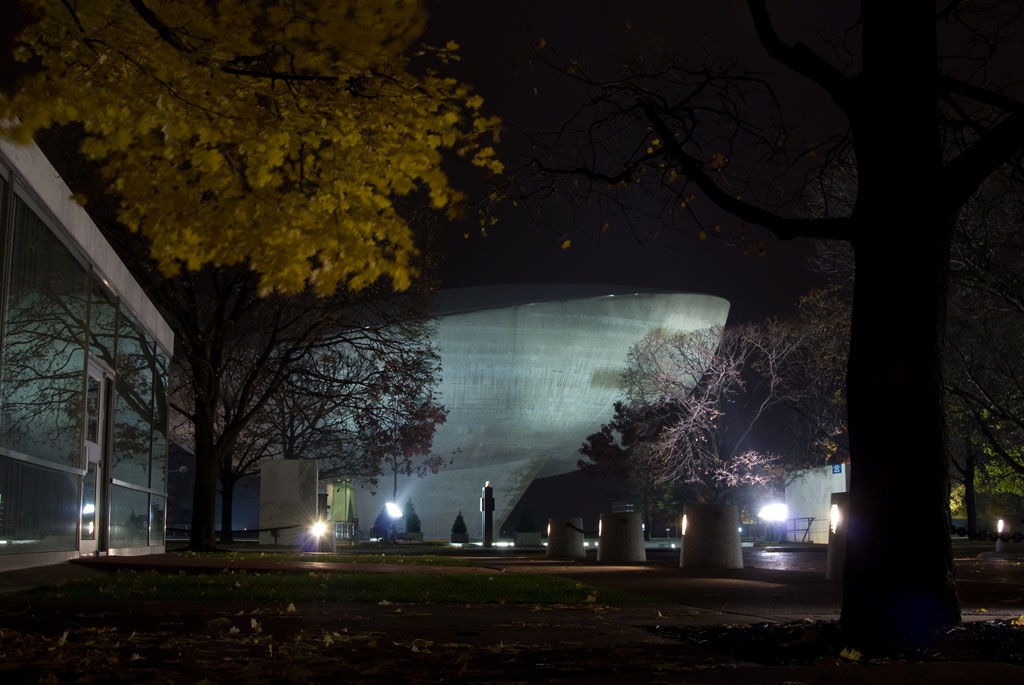
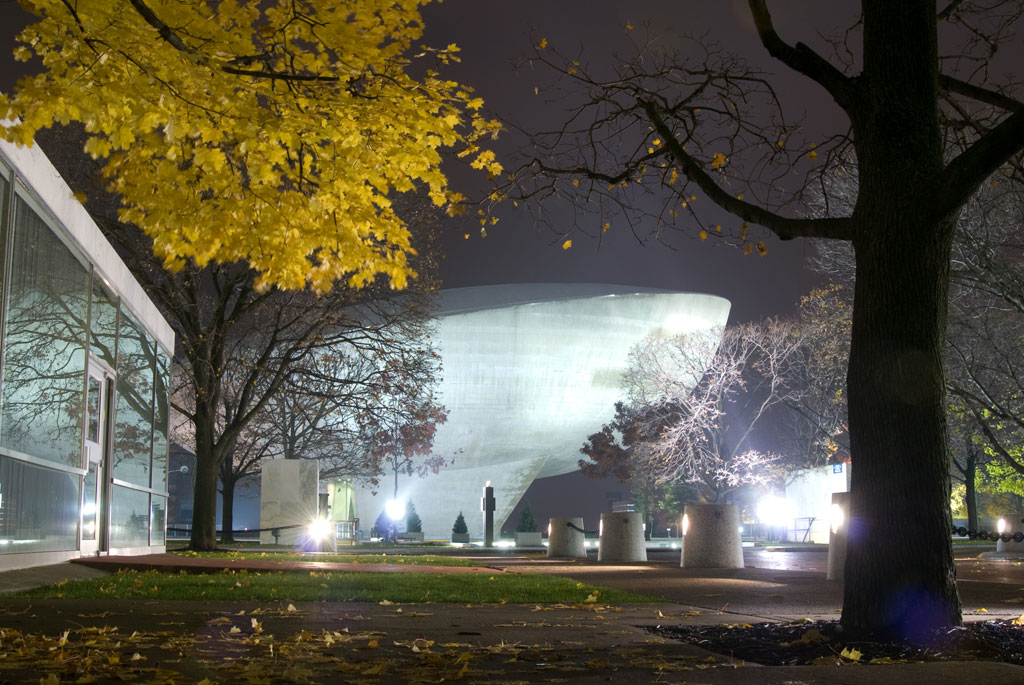
The next step is to shoot. Gently click shutter button. Then take your hand out and let the camera to it job. If you have set up auto bracket, simply repeat the previous step two more times. If you do or cannot, you need to set up your exposure manually. What you need is one photo with a higher exposure and one with lower exposure. However, do not obtain these photos by changing your aperture because it will change the depth of field of the photos. For example if your EV 0 photo taken at 1/60 second with f/8, the lighter one (+2EV) should be shot at 1/15 second with f/8, and the darker one (-2EV) should be shot at 1/250 with f/8.
Back to your computerFirst, upload your photos into your computer. If you use RAW files, you need more stepwell, quality always comes with time consuming. For RAW files, you need RAW viewer program or plugs-in. I use Adobe Lightroom to view your photos. If you use Photomatix or Dynamic Photo-HDR, you do not need to convert RAW files to JPG because they are able to read RAW files.
Now, we will move to creating HDR image. I am going to go through only a basic here because I do not know what program you are going to use. In fact, most of the programs already have easy instruction online. Basically, you need to click create HDR image button (for Photoshop it is in File > Automate > Merge to HDR). Then choose your different exposure photos. Normally, the program will know what EV is for photos. In case that there is no metadata embedded with photos, you need to set by yourself. Check EV table for your convenience. If you use Dynamic Photo-HDR, you, then, are allowed to align your image manually, and you can also eliminate the ghost images in this process, although I find out that it does not work really well.
Then the program will generate HDR file. Nevertheless, the light and color of the file will look weird because a normal screen cannot display 32-bit color. You can save your file in this process in case that you want to do tone mapping again, but the file will require a lot of space. Some program also allows you to adjust light in this state, but I recommend you to wait for tone mapping.
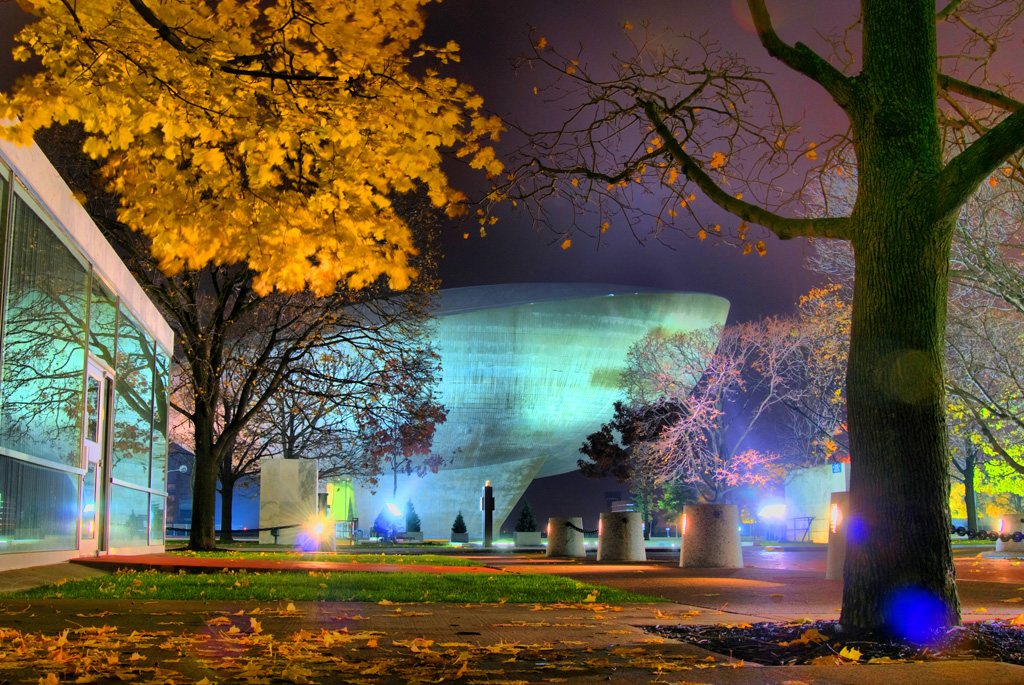
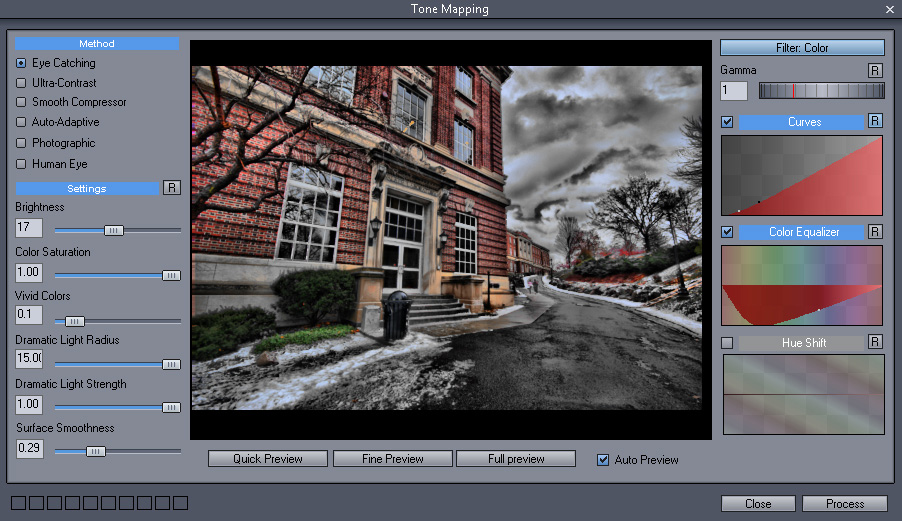
Now, it is time tone mapping, which is one of the most important part of making HDR photo. As discuss previously, tone mapping is the process to map the color of the HDR file to a new one that has 8-bit or 16-bit. To initiate tone mapping menu, in Photoshop, you click at Image > Mode > choose either 8-bit or 16-bit, and in Dynamic Photo-HDR, you click at Tone Map HDR file button. There will be multiple methods for tone mapping for you to choose. In Photoshop, I recommend Local Adaption method in which you are able to control the curve of the color of your final image. This method also can give you a dreamy effect by controlling radius and threshold. Still, there is not much control for this technique in Photoshop. In Dynamic Photo-HDR, two methods that I recommend are Eye Catching and Ultra-Contrast. Although there are many adjustments that you can change, the interface is very easy to understand, for you can see the changing in a preview screen.
Retouching
|
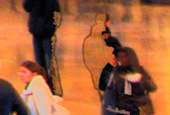

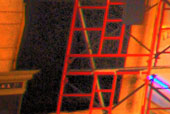
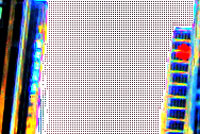

The images above are errors that often occur from HDR technique. On one hand, not all final images will have these problems. On the other hand, some have the problems so severely that they cannot be recovered.
First, lets talk about the ugly ghost problem. Many ghost images in HDR photography add beauty to their photos. But they can also come out badly usually when they are partially man and partially ghost. This problem can be solved by Stamp tool. Use Stamp tool to ease whole ugly ghost or add the part that it missing. Blur tool also can be use to blur the border of ugly ghost that is pixelize.
The next problem is that some colors, especially bright ones, are misrepresented. This can be solved by painting over the misrepresented area by Blush or Stamp tool. If there are too many error areas, use replace color tool to change the color of the error areas to the color of their surroundings.
HDR technique creates more grain in the final image, especially in dark area. This issue can be solved by selecting dark area by Color Range. Then copy it into new layer and add Gaussian Blur to the new layer. In addition, the noise also can be reduced by Reduce Noise filter or Neat Image plug-in.
While dark space in HDR technique has more grains, completely white area can has something worsea set of symmetric grayish pixels. You cannot solve this problem with like how you reduce noise. For instead, use Bush or Stamp tool to color over those areas. Nevertheless, there is plug-in called Auto FX which can create dreamy effect to your image. This effect can be used to reduce both noise and erroneous white. Or if the area is in the size of the image, cropping may be a good idea.
When final image is created with photos that have to be aligned, it will leave space along the border black or weirdly shown. Solving this problem is very simple by using Crop tool.
Besides using Photoshop to solve these problems in HDR photography, it can also be used for other adjustments, such as highlight, hue, or brightness control. However, I suggest that if it is possible to adjust light during tone mapping, you should not wait to do it in Photoshop because changing light of a final image can take some detail of the image away. There is also shaping technique by High Pass filter which works well with HDR image. This technique and some other techniques that deal with HDR photography are nicely explained in Stick In Customs Website.
References/Influences
http://www.cambridgeincolour.com/cambridge-gallery.htm
http://en.wikipedia.org/wiki/High_dynamic_range_imaging
http://www.flickr.com/groups/hdr/
http://stuckincustoms.com/2006/06/06/548/
http://www.youtube.com/watch?v=CVuDbcAfN_I
http://www.youtube.com/watch?v=HP7OkqrfxSo&feature=related