Adobe After Effects®
After Effects (Æ) is
a tool for compositing and adding animation and special effects to your projects.
You can create motion graphics and visual effects for film, video, and multimedia.
In this session you will start learning
about the Æ environment by: naming a project; importing footage into a
project window; setting up a composition; examining the comp window; and examining
the time layout window.
TOPIC: Basics of the Æ
environment
|

|
1. Importing footage
- load the AfterEffects_1 files onto your computer
- launch Æ (if you haven't already) by double-clicking
on the application icon, or choosing it from the applications menu
- open the project red.aep. Save it.
- from the menu select File > Import > File
- from the AfterEffects_1 folder, select red.ai
- click import
|
 |
2. Setting up a composition
- from the menu select Composition> New Composition (command-N)
(note the options)
- leave the name as Comp 1.
- note the preset options, the pixel aspect ratio, the frame
rate, the resolution, the timecode and duration
- double-click in the duration text box and type 13:00. This
creates 13 seconds no frames worth of composition time.
- click ok
|
 |
3.Compostion and time layout windows
The composition window is where you'll create, modify and arrange your
final output. Footage added to the comp window becomes a layer within
that composition that can be animated and modified with effects. The layers
are stacked on top of one another as they are added, with the first item
at the bottom of the stack.
Notice the tab at the top of the comp window. This tab tells you which
composition is active.
|
 |
The time layout window provides a visual description, in the form
of a timeline, of the composition layers over time. It also provides a
way to adjust the settings for each layer so you can add effects and animate
layers or access the layer settings, including transform, mask, and effects
properties.
|
When you modify a layer, you don't
change the original source footage. When you view a composition or render it
into a movie, AE reads footage from its original files on disk and combines
your changes with it, generating new frames while leaving the original footage
intact.
TOPIC: Animating Compositions
 |
1. Importing multiple files
- from the menu select File > Import > Multiple Files
- select rock.psd and click on open. Because this file
contains layers, the rock.psd dialog box opens. Accept the default settings
(merged layers).click on OK. The dialog box now reappears, so
you can continue to import footage.
- select spaceship.png and click on open. Because this
file contains an alpha channel, the interpret footage dialog box opens.
We want to maintain the transparency, so select premultiplied -- matted
with color (leave at default black)
- open files background.mov and soundtrack.mov and click on done
- from the menu choose File > Save
|
Now you'll add the rock file to
the composition and scale it.
2. Scaling a composition layer
- click on the first triangle to expand the transform properties
for the layer in the composition timeline
- click on the small triangle to the left of Transform to expand
the properties.
- select the underlined scale value. Set the initial scale value
to 0.
- set the first scale keyframe.

- in the upper-left corner of the timeline window, click on the underlined
current time. In the Go To Time dialog box, type 300 and
click OK.
- go back to your time layout window and select the underlined scale
value, but this time in the scale percentage text field, type 150.
Press the enter key on your keyboard. Now you'll set your third keyframe.
- change the current time to 410. Select the underlined scale
value, type 0 and press ENTER.
|
You should have just successfully
animated one layer of your composition. The image will seem to grow out of the
center of the frame steadily, until it reaches 150% of its original size at
3 seconds, and then shrink to nothing at 4 seconds, 10 frames. Test the animation
3. Copying and pasting keyframes
- hold down the SHIFT key and select the keyframes at
4:10 and 3:00
- choose Edit > Copy. You will now paste the keyframes further
down the timeline.
- change the current time to 10:00. Select the underlined current
time. In the Go To Time dialog box, type 1000 and press ENTER.
- choose Edit > Paste. (command V) to paste the selected frames.
|
One of After Effects' productivity
enhancements is the Time-Reverse keyframe assistant feature. This feature
allows you to quickly reverse the values associated with a pair of keyframes.
 |
- choose Animation > Keyframe Assistant > Time-Reverse Keyframes.
The scale values associated with the keyframes will reverse. What was
150% at 10:00 is now 0%, and what was 0% at 11:10 is now 150%.
- preview your movie using the home key and spacebar.
|
4. Rotating a composition layer
- press HOME on the keyboard
- With the rock.psd source layer selected, press the R key to
show only the Rotation property
- click on the rotation stopwatch. In the Rotation dialog box,
you'll set the layer to make three revolutions.
- set the current time to 3:00
- control-click on the underlined rotation value and choose
Edit Value
- double-click in the revolutions field and type 3.
- click on OK.
|
The image will scale as it did before,
but now it will also rotate clockwise as it grows in size between 00:00 and
03:00 in the timeline. Let's save and preview the project.
5. Creating and Synchronizing Motion
A motion path defines the
the path along which an object moves in an animation sequence. After Effects
performs a mathematical operation called interpolation, which determines
all the positions the object will take in each frame in between.
- in the timeline, click at the 04s point. This marks our "in"
point for the image. The Inpoint of the layer is determined by the location
of the current-time marker at the time you drag the object into the
time layout window.
- now drag the spaceshp.png file from the project window iinto the
time layout window
- choose Layer > Bring Layer to Front to ensure that the layer
is always visible on the frame.
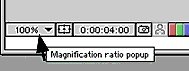
- click on the comp 1 window title bar and using the magnification pop-up
menu, change the view to 25%.
- drag the image into upper right hand corner of gray area surrounding
the image in the composition frame. Only that part of the layer that's
in the image area will appear in your final movie. This allows you to
start the layer's motion path outside the image area.
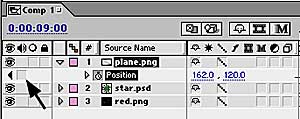
- to set the first position of your first keyframe, select the
image layer in the timeline and press p on your keyboard to open
the position property.
- click on the position stopwatch to set the first keyframe.
- use the current time setting to move to 08s on the timeline.
A second keyframe is established automatically as you drag the image
to its new location (the center of the composition window). Its location
is fixed when you release the mouse button.
- use the current time setting to move to 09s. Check the Keyframe
Navigator to make another keyframe identical to the one at 08:00
(little arrow underneath the eye in the Timeline for the active layer).
These keyframes will cause the image to hold its position at the center
of the image for one second.
- use the current time setting to move to 10s in the timeline
window. Deselect the image. Start dragging the image to
the center top of the composition frame, but before dragging, hold
down the shift key. The shift key modifier creates a motion path
along a straigth line.
|
You can create the illusion that
the plane is falling by scaling the image smaller as it moves toward the center
of the planet layer. To create this effect, you'd set scale keyframes for the
spaceship layer and synchronize them with the position value keyframes.
TOPIC: ADDING EFFECTS TO YOUR COMPOSITION
 |
1. Adding a Drop Shadow effect
- if you haven't done so already, choose File > Save
- select the spaceship layer in the time layout window
- press I to go to the Inpoint of the spaceshp layer
- click on the small white triangle to expand masks, effects
and transform options
- expand the effects options
- from the menu, choose Effect > Perspective > Drop Shadow
|
2. Creating an adjustment layer
An adjustment layer is a layer to
which you may apply effects independent of any footage item layer. Effects are
applied and edited on an adjustment layer just as they would be on any other
layer. You should use adjustment layers when you want to apply the same effect
to several layers, since an adjustment layer affects every layer below it in
the Timeline window's stacking order.
3. Nesting
- choose Composition > New Composition
- in the Composition Settings dialog box, click on OK. Comp 2
is added to the Project window. The Comp 2 tab is displayed in the Composition
and Time Layout windows.
- select the Background.mov QuickTime movie
- drag Background.mov from the Project window into the Timeline
window. Next, let's nest Comp 1 into Comp 2
- select the Comp 1 composition in the Project window
- drag Comp 1 from the Project window into the Timeline Window
- choose Layer > Bring Layer to Front
|
4. Previewing movies using RAM Preview function
- choose Window > Time Controls. The Time Controls palette
is displayed. Once After Effects determines how much of your compostion
it can safely preview, it previews that amount at actual speed. If you
click on the RAM Preview button while the composition is still rendering,
it will stop and move to real time.
- click on the RAM Preview button.
 When you are ready to continue, click on the RAM Preview button again
once or twice. If AE is unable to preview the whole composition at full
resolution with the RAM that's in your computer, you can use the Resolution
drop-down list in the Composition window to decease the resolution.
This will allow computers with less memory to preview more of the project).
Notice that the current time marker has returned to 0 You will now preview
the animation with the audio track.
When you are ready to continue, click on the RAM Preview button again
once or twice. If AE is unable to preview the whole composition at full
resolution with the RAM that's in your computer, you can use the Resolution
drop-down list in the Composition window to decease the resolution.
This will allow computers with less memory to preview more of the project).
Notice that the current time marker has returned to 0 You will now preview
the animation with the audio track.
- close the Time Controls window
- select soundtrack.mov
- drag soundtrk.mov into the Timeline window
- choose Window > Time Control. The Audio button toggles
the ability to preview an audio track, along with video footage, on
and off. When it's in the down state, the audio is included in the preview.
You won't hear the audio until the composition is rendered.
- click on the RAM Preview button. When you're ready to continue,
click on the RAM Preview button once or twice. You can also preview
an audio track without video footage. The audio track will preview by
itself for a default time of 4 seconds.
- select Composition > Preview > Audio Preview (Here Forward)
or press the . (period key) on the numeric keypad (or for me, function
period)
- press Delete to stop the audio preview
|
TOPIC: Creating Titles and animated
text
1. Creating and formatting text
- With the Time line window active and the current time marker at 10:00,
choose Layer > New > Solid. The Solid Settings dialog box
is displayed
- modify the name, width and height and click OK.
- With the Visit Layer selected, choose EFFECT > TEXT > BASIC
TEXT.
- Click inside of the text area. Type VISIT and click on
OK.
- In the Visit - Effect Controls window, click on the right-facing
triangle for Fill and Stroke.
- From the pop-up menu to the right of the Fill and Stroke Display
options category, choose Fill Over Stroke. To the right of the
Fill Color category in the Effect Controls window, click on the color
swatch and select a yellow fill color. Click on OK.
- To the right of the Stroke Color category in the Effect Controls
window, click on the color swatch, select a green stroke color and
click on OK.
- Close the Visit - Effect Controls window
|
2. The title safe zone
In the world of video for broadcast,
all elements that play on the screen must be placed within the action-safe and
title-safe zones. When you shoot video, the edge of the frame that you view
through the camera isn't exactly what you see when it's played on a television.
Action and text that butts up against the outermost edges of the raw footage
runs the risk of being cut off when displayed on a television screen. This screen
shows the location of the safe zones in a compostions viewable area. You can
display the title-safe and action-safe zones in the compostion window
3. Using the In/Out Panels in the Timeline Window
- Click on the left and right-facing window expansion arrows
- The In/Out panels are open and there are 4 new columns in the timeline;
In, Out, Duration and Stretch.
- close the In/Out panels by clicking on the expansion arrows
|
4. Exporting to QuickTime
Rendering is the process of converting
a final composition into a finished movie, ready for playback on the medium
of your choice. If you have QuickTime 4 or later installed on your system, you
can export items using components provided by QuickTime. Rendering movies directly
to the QuickTime MOV format is useful when you want to render a single movie.
To gain more control over the rendering process, you should probably use the
render queue.
The specific file formats to which
you can export depend on how you configure QuickTime. Installing QuickTime adds
the ability to use After Effects to export in the AIFF, AVI, DV Stream, FLC,
Image Sequnce, QuickTime Movie and WAF file formats.
- choose File > Export > QuickTime Movie
- ignore the render queue message and click OK
- in the save dialog box, name your movie and click save
- The movie settings dialog box allows you to access all the available
QuickTime rendering options. uncheck sound and uncheck
prepare for internet streaming since this movie won't use sound
or be played over the internet. click OK
- Go to the finder and open the newly rendered movie.
|